Camping isn’t free from bad weather like storms, rain, high wind, and so on. To deal with those camping challenges, tarps are used as good protectors. Now, you may have a tarp but it flaps or billows frequently. This is very annoying and disturbing. And ultimately, it will negatively affect your camping experience. So, what should one do? Having a tarp, you should be aware of how to keep the tarp from flapping.
By knowing some simple tricks, you will never experience issues like that.
In this article, I will share some tricks and ways to protect the tarp from billowing.
Why Does Tarp Flap?
The wind is the first thing that may come to mind whenever you search for a reason. Yeah, that’s one of the major reasons for it.
But only wind can’t billow the tarps. So what are those responsible factors?
Some tarp materials come with a stretchy character. And because of its stretchy nature, the flap can happen.
Another thing is looseness. The loose setup brings billowing even if the wind is moderate. If the combination of corners setup, knots, ropes, etc., isn’t perfect, then obviously you have to prepare for the worst experience. Again, selecting the wrong campsite, you may be faced with huge wind as well as flapping.
So, those are major causes for why billowing can happen in the presence of high wind, night wind, storms, and more.
How to Keep Tarp from Flapping: Tips & tricks
No matter how good the quality of your tarp is, billowing or flapping is normal whenever you are outdoors. And you have to search for solutions to keep it secure Okay now, move on to the effective and simple ways to survive the tarp shelter from wind or else.
1. Go for a Large Tarp Instead of a Small
The first trick that you should apply before hitting the camping is the tarp selection.
And at this point, a bigger one is an ideal solution. How? Well, if your tarp is large, then obviously it will hold more weight. As a result, the flapping process is limited. Moreover, the big shelter will protect you from rain or storm. That’s how the bigger tarp will provide weather protection as well as enough room to stay.
But whenever you are under a smaller tarp, the wind will get more opportunities to play with it.
So, it will be a wise thing to do the calculation of size and shape before.
2. Be smart to Select the Perfect Camp Area
Seems weird? But it’s right that a perfect campsite can offer you a billow-free tarp experience.
So, what points one should remember to grab that opportunity?
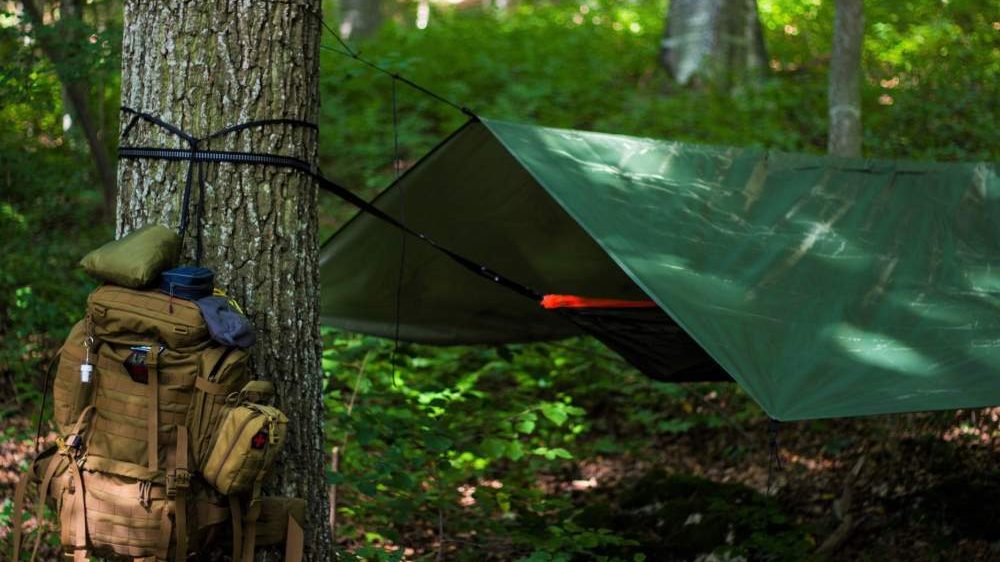
First, search for a spot where shade and trees are present. More trees will protest the excess winds. Again, the trees also work as a natural windbreaker which is a plus point to keeping the tarp stable.
Second, notice the movement of air and understand its direction. Then, place the shelter in the opposite direction of the wind. And also make sure that it stays lower than the ground. Cause it slopes toward the river, lake, or others and controls the excess wind moving under the tarp.
3. Keep Tight Each Tie Points
While setting up, keep the ties tight enough. For the corners, the angle should be straight and tightened strongly. If you use any other medium to tie the trap without trees then it is obvious to check the strength level of the base and tie points. Because it can tell you whether it will be strong against the flap or not. Anyways, poles can be a good option while thinking about stakes on the ground.
If your tarp has a tie-out then it will be super easy to give it a strong fit. Again, supporting the tarp corners with sticks brings effective results.
So, fix the corners to get a tight position to resist the wind and secure the tarp from blowing away.
4. Use the Tarp Tension
If your product has a middle tie then you can easily pull it to the outside. And look for the tightness level and perfection. Furthermore, the guylines can be workable in this term to make tensioning on a tent or hammock. The line should be nice and tight. However, in both ways, one of the similar tasks is to maintain the angle. According to the expert, it is 45 degrees.
That’s how, along with material, the tension provides excellent service to prevent flapping.
5. Don’t set it up too high
To minimize the wind blowing, the tarp should be placed at a low height.
So, what will happen if you place it high? Well, for the tall or larger camper, it will be a good room for the head. But the con is, that the height will welcome the air to blow through it more powerfully and make the shelter more exposed to powerful wind.
With that said, by setting it up in a lower place, we can reduce the problem.
Anyways, it is okay to use great height when there is little air. But in terms of large winds or storms, you can’t rely on it.
Another thing to remember is, you need to make a height difference between the two parts. One should be higher than the other. The reason is it will work as water drainage. If there is any chance of rain then you can build a custom rain drainage.
And lastly, don’t place your tarp over a fire cause there is a risk that it may burn.
So, those are the essential steps that you can follow and keep the fly away from billowing.
What are the benefits of tarps when camping?
Tarps can be very useful when camping for a number of reasons:
- Protection from the elements: Tarps can be used to create a makeshift shelter or to cover and protect your gear from rain, wind, or sun.
- Versatility: Tarps are very versatile and can be used in a variety of ways, such as to create a tent, shade, or windbreak.
- Lightweight and compact: Tarps are much lighter and more compact than tents, making them a good option for backpackers or anyone looking to travel light.
- Cost-effective: Tarps are generally less expensive than tents, making them a budget-friendly option for camping.
- Easy to set up: Tarps are usually very easy to set up and can be used with a variety of different configurations, depending on your needs.
- Durability: Tarps are typically very durable and can withstand rough weather conditions.
- Can be used in a variety of settings: Tarps can be used in a variety of settings, including backcountry, car camping, and more.
FAQs
How do you keep a tarp tight?
Here are some tips for keeping a tarp tight:
- Use tent stakes or metal stakes to anchor the corners and sides of the tarp securely to the ground.
- Use ropes or bungee cords to cinch the tarp tight between the stakes.
- Use multiple tie-out points on the tarp to distribute the tension evenly.
- Use a tarp with grommets or tie-out points built-in to make it easier to secure to the ground.
- Use a tarp that is the appropriate size for the area you want to cover. A larger tarp will have more slack and be harder to keep tight.
- In windy conditions, use additional stakes and ropes to keep the tarp from flapping in the wind.
- Try to use a tarp with a reinforced edge so it will be more difficult to tear.
- Avoid using cheap or worn out ropes, these will be more likely to stretch and lose tension.
- Lastly, Always try to set up your tarp in an area that is out of the wind or sheltered.
It’s also important to note that the technique of securing the tarp might be different based on the tarp’s design, the weather condition and the surface you are laying it on.
How do you seal the edge of a tarp?
There are a few ways to seal the edge of a tarp, depending on the material and the type of seal you want to create:
- Use duct tape: Duct tape can be used to seal the edges of a tarp made from a waterproof or water-resistant material. Simply apply the tape to the edges of the tarp, making sure to overlap the tape slightly to create a tight seal.
- Use a sealant: A tarp sealant, such as seam sealer or waterproofing spray, can be used to seal the edges of a tarp made from a waterproof or water-resistant material. This will create a flexible and durable seal that will help to prevent water from seeping through the edges of the tarp.
- Sewing: You can also sew the edges of the tarp to create a seal. Use a heavy-duty thread and needle, and make sure to sew tightly so that no water can seep through.
- Heat sealing: Some tarps can be heat sealed using a special machine, this creates a permanent and water tight seal on the edge of the tarp.
It is important to note that not all tarps are designed to be completely waterproof, some are water-resistant, and some are not. If you have a tarp that is not waterproof or water-resistant, it’s best to avoid using it in wet conditions or use it in conjunction with another tarp or a rainfly.
How do you reinforce a tarp edge?
There are several ways to reinforce the edge of a tarp, depending on the material and the level of reinforcement you need:
- Use grommets: Installing grommets along the edge of the tarp can reinforce the edge by providing an additional point of attachment for ropes or bungee cords.
- Use webbing: Adding a strip of heavy-duty webbing along the edge of the tarp can reinforce the edge by providing an additional layer of material to resist tearing or fraying.
- Use a reinforcing tape: A tarp reinforcing tape, such as a polyethylene-reinforced tape, can be used to reinforce the edge of the tarp by providing an additional layer of material that is resistant to tearing and fraying.
- Use a patch: You can use a heavy-duty patch made of the same or similar material as the tarp. This can help to reinforce the edge of the tarp by providing an additional layer of material that is resistant to tearing and fraying.
- Use a seam sealer: Seam sealer can be used to reinforce the edge of the tarp by adding a layer of material that is resistant to tearing and fraying.
It’s important to note that the best way to reinforce the edge of a tarp is to use a combination of these methods, as it will provide the most robust reinforcement. It’s also important to use the right type of material and to use it correctly. It’s best to consult with a professional or refer to the manufacturer’s instructions when reinforcing the edge of a tarp.
Are tarps windproof?
No, tarps are not windproof. A tarp is made up of a thin, often plastic material that is not very strong or durable in strong winds.
Tarps are designed to be lightweight and provide a lightweight and cost-effective way to provide a temporary shelter or cover for items, but they are not designed to withstand high winds or weather conditions.
In high winds, a tarp can easily tear or be ripped away from its anchors due to its lightweight design. Additionally, the holes in the material will allow wind to pass through, making them unsuitable for providing a secure shelter in windy conditions.
It is possible to use a tarp in windy conditions by using extra anchors and tarp ties to secure it, as well as using a thicker, heavier-weight tarp. If a heavier tarp is used, it is important to ensure that it is securely tied down to prevent it from being ripped away.
It is also important to ensure that the tarp is free from any tears or holes, as these can allow wind to pass through and cause the tarp to tear or be ripped away.
Overall, tarps are not windproof but can be used in windy conditions if the correct precautions are taken. It is important to ensure that the tarp is securely tied down and free from any tears or holes, and it may be necessary to use a heavier-weight tarp to ensure that it is less likely to be ripped away in strong winds.
Conclusion
Survival trick against tarp flapping isn’t an instant process, it requires planning. Some factors you should concern yourself about before and at the time of setup are those I mentioned already.
Doesn’t it look simple? I think it’s so simple and worth doing.
Alright. Now, I hope applying those guides on how to keep the tarp from flapping will give you an excellent output on your next camping tour.
More Articles:
- How to Repair Pop-Up Camper Canvas?
- What Size Tarp for Camping?
- How to Keep Air Mattress from Deflating Overnight
- How to Attach Sleeping Bag to Backpack- 5 Solutions
- Pros and Cons of Hammock Camping (Major Points)
- How to Insulate a Tent for Winter Camping (13 Hacks)
- How To Cool A Tent Without Electricity (13 Smart Ways)


